- how-to-choose-the-right-trampoline-model-for-your-yard
- preparing-the-installation-area-for-a-trampoline
- step-by-step-guide-to-trampoline-assembly
- important-safety-guidelines-for-home-trampoline-use
- real-life-experience-trampoline-setup-story
- where-to-shop-for-quality-trampolines-in-the-us
1. How to Choose the Right Trampoline Model for Your Yard
Selecting the perfect trampoline starts with understanding your available space, your family's needs, and the safety features you prioritize. Whether you're shopping for small children or active teens, size and shape matter. Rectangular trampolines are ideal for more advanced jumpers, while round ones provide even bounce and are great for beginners.
Another critical factor is weight capacity. A family of four will need a trampoline that can support multiple jumpers without compromising safety. Look for models with UV-resistant mats, galvanized steel frames, and high-grade springs. If your backyard has uneven terrain, consider models with adjustable legs or in-ground trampolines for added stability.
To make this easier, Trampoline Zone offers a curated range of trampoline types—from compact backyard trampolines to large gym-quality models—tailored for American homes and families.
2. Preparing the Installation Area for a Trampoline
2.1 Choosing a Flat, Safe Location
Before unpacking any parts, you’ll need to find a level surface with ample clearance. Avoid placing trampolines near trees, fences, or power lines. A good rule of thumb is to allow at least three feet of space around the perimeter and 20 feet of vertical clearance above.
2.2 Ground Preparation and Surface Safety
Grass is the most common surface, but it should be flat and dry. Avoid concrete or gravel unless you’re using specialized trampoline mats or anchors. For sloped backyards, consider minor landscaping to create a stable base. A soft landing zone—like bark mulch or rubber mats—around the trampoline adds an extra layer of protection.
2.3 Weather Considerations
Wind and sun exposure play important roles. Anchor kits are essential in windy areas, and UV protection will preserve the trampoline over time. If your region experiences harsh winters, plan for seasonal maintenance or disassembly to prevent weather-related wear and tear.
3. Step-by-Step Guide to Trampoline Assembly
3.1 Unpacking and Organizing Components
Lay out all parts and review the manual before starting. Most trampoline kits come with labeled parts and step-by-step illustrations. Set aside all bolts, springs, poles, and safety net components before beginning assembly.
3.2 Assembling the Frame and Legs
Begin by constructing the circular or rectangular base. Attach legs evenly and tighten all bolts securely. It helps to have two people during this step—one to hold sections in place and one to screw them in.
3.3 Installing the Jump Mat and Springs
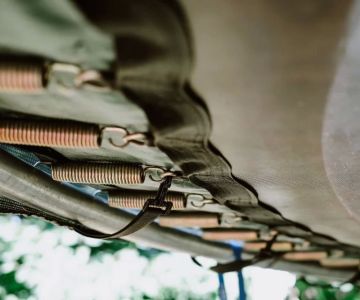
Attach the mat to the frame by connecting springs in an alternating cross pattern to ensure even tension. This part can be physically demanding, so use the spring tool provided in most kits for leverage.
3.4 Setting Up the Enclosure Net and Padding
Safety enclosures are a must, especially for children. Attach the poles and slide the net over or tie it into place depending on the model. Cover all springs with padding to prevent foot or leg injuries during use.
Most people complete the setup in 2–4 hours, depending on experience and the trampoline size. If you'd prefer professional help, many local services specialize in trampoline assembly.
4. Important Safety Guidelines for Home Trampoline Use
4.1 Supervision and Jumping Rules
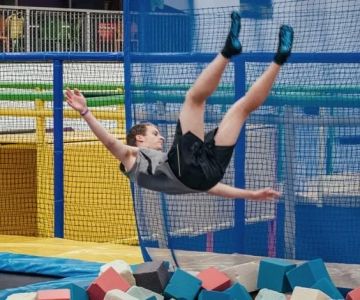
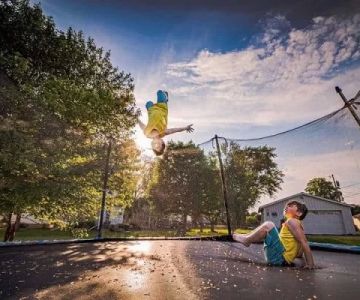
The number one safety rule is adult supervision. While trampolines are fun, unsupervised jumping can lead to injury. Only one jumper at a time is recommended, and flips should be avoided unless supervised by a trained adult.
4.2 Maintenance and Inspections
Check your trampoline regularly for rust, frayed mats, or weakened springs. If your trampoline is used frequently, perform inspections at least once a month. Replace any damaged parts immediately to ensure safe play.
4.3 Use of Safety Accessories
Never skip safety features. From ladder locks to weather covers and impact-absorbing netting, these accessories help extend the trampoline's life and prevent accidents. Ground anchors are especially useful in areas with strong winds.
For added safety insights, Trampoline Zone provides extensive guides and access to replacement parts, so you’re never left with a risky setup.
5. Real-Life Experience: A Trampoline Setup Story
Last summer, the Thompson family from Austin decided to set up a trampoline to help their kids stay active during school break. They purchased a 14-ft round trampoline with an enclosure from Trampoline Zone. What made their setup unique was the use of a sloped backyard.
Instead of giving up on the idea, they leveled out a 16-foot radius with help from a local landscaping service and laid down mulch for added cushioning. The setup took them a full Saturday, but the joy on their kids’ faces made it worthwhile. They even added solar-powered LED lights around the net poles for evening use.
Their biggest advice? Don’t rush the process—take time to get the foundation right. Now their trampoline is the neighborhood hangout, and they regularly share safety tips with other parents.
6. Where to Shop for Quality Trampolines in the U.S.
When it comes to buying a trampoline, avoid going for the cheapest option. Quality matters, especially for safety and long-term durability. American families often look for a balance of price, warranty, and customer service. That’s where Trampoline Zone truly shines.
We specialize in high-quality trampolines designed for U.S. backyards—offering everything from compact models for tight spaces to heavy-duty frames for active families. Plus, with expert advice and fast shipping options, you get more than just a product—you get peace of mind.
Before making a purchase, browse reviews, compare models, and make sure the trampoline matches your yard and usage expectations. Investing in a trampoline is not just about fun—it’s about building memories that last.




 Mainland City Centre3.0 (1447 reviews)
 Urban Air Trampoline and Adventure Park4.0 (1834 reviews)
 Play and Spin3.0 (982 reviews)
 Movement San Francisco4.0 (315 reviews)
 Spunky Monkey4.0 (373 reviews)
 Sky Zone Trampoline Park4.0 (746 reviews)
 Are Trampoline Parks Safe for Kids? Essential Guide for U.S. Parents
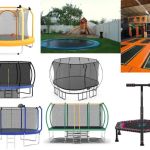 How Much Is a Trampoline? A Detailed Guide to Trampoline Costs and Buying Tips
 How Often Should You Replace Trampoline Springs? Tips for Proper Maintenance
 Bounce Techniques for Stronger Legs: Effective Exercises and Tips
 Essential Music Gear for Trampoline Dance: Complete Guide
 Fun STEM Experiments Using Trampolines to Spark Curiosity and Learning