
- why-set-up-trampoline-home - Why Setting Up a Trampoline at Home Makes Sense
- choosing-right-trampoline - How to Choose the Right Trampoline for Your Family
- location-preparation-safety - Preparing the Location and Ensuring Safety
- step-by-step-installation-guide - Step-by-Step Trampoline Installation Guide
- common-mistakes-solutions - Common Mistakes and How to Avoid Them
- real-life-story-setup-experience - A Real-Life Story: One Family’s Trampoline Setup Experience
- where-to-buy-trampoline-gear - Where to Find Quality Trampolines and Gear
1. Why Setting Up a Trampoline at Home Makes Sense
Installing a trampoline at home is more than just a fun idea—it’s a smart investment in your family’s health and happiness. With screen time on the rise, many parents are looking for ways to encourage active outdoor play. A home trampoline promotes physical activity, builds balance and coordination, and offers a social hub for kids and adults alike.
From improving cardiovascular health to simply letting off steam after school, a trampoline offers an easy, low-maintenance way to enjoy the backyard all year round. And when properly installed, it becomes a long-term fixture of joy.
2. How to Choose the Right Trampoline for Your Family
Before diving into setup, it’s crucial to select the right trampoline based on your space, family size, and usage plans. Trampolines come in different shapes—round, rectangular, square—and sizes ranging from compact 8-footers to pro-level 17-foot rectangles.
2.1 Size and Shape Considerations
Round trampolines are great for family use as they naturally center jumpers, while rectangular ones are preferred by gymnasts for their bounce and space efficiency. If you’re limited on yard space, a square or oval trampoline might be ideal.
2.2 Weight Limits and Frame Quality
Always check the manufacturer’s specifications for weight capacity. Stainless steel frames with rust-resistant coatings last longer and perform better under pressure—literally. Safety nets and padded poles are also essential.
You can browse highly-rated, safety-tested options at Trampoline Zone, where we only feature products that meet U.S. safety standards.
3. Preparing the Location and Ensuring Safety
Once you’ve chosen your trampoline, you need to prepare the setup site. Pick a flat, grassy area with a 3-foot clearance around all sides. Avoid placing it near fences, trees, or power lines. Ideally, you want a space that allows free movement and optimal visibility.
3.1 Ground Prep
Clear any rocks, debris, or sticks from the surface. A level surface prevents uneven bouncing, which can cause injury. Consider laying safety mats or bark mulch underneath for extra cushioning.
3.2 Wind Protection and Anchoring
Trampolines can become airborne in storms. Use anchor kits to firmly secure the frame to the ground. For windy regions, installing wind stakes is a must.
4. Step-by-Step Trampoline Installation Guide
Setting up a trampoline can be a one-person job, but it’s far easier with two. Here's a basic guide for most round trampoline setups:
4.1 Frame Assembly
Begin by laying out the metal frame pieces according to the manual. Connect the outer ring and ensure all T-joints are tightly secured. This will form the trampoline's base.
4.2 Attaching the Mat
Lay the jumping mat inside the ring and start attaching the springs. Do this in a star pattern—north, south, east, west—then work your way around. This balances the tension evenly.
4.3 Safety Net and Poles
After the mat is secured, install the vertical poles and net. These should be padded and tightly fixed. Make sure the zipper or buckle closure functions smoothly.
At Trampoline Zone, we also offer installation services in select areas—perfect for families looking for a professional touch.
5. Common Mistakes and How to Avoid Them
Even the best DIYers can run into trouble. One common error is uneven spring tension, leading to weak bounce zones. Fix this by detaching and reattaching the springs symmetrically. Another mistake is poor net installation—often leaving gaps that can cause injuries.
Skipping the anchoring process is another frequent issue. A sudden gust of wind can flip or move an unsecured trampoline. Always anchor it down, no matter how heavy it feels.
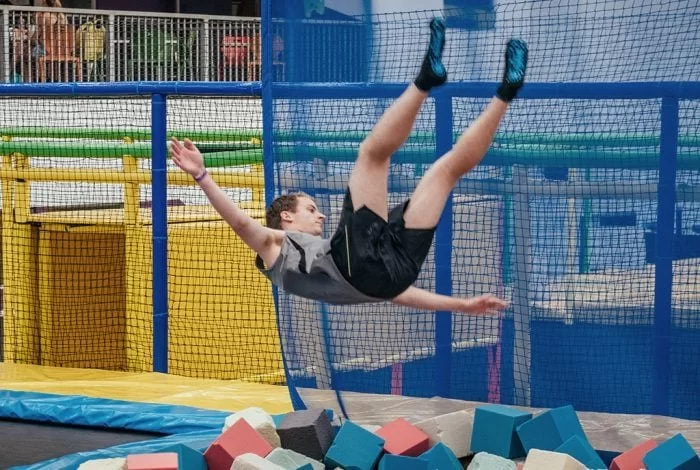
6. A Real-Life Story: One Family’s Trampoline Setup Experience
Last summer, the Mitchell family from Ohio decided to turn their backyard into a mini adventure zone for their three kids. “We researched for weeks,” says Amy Mitchell. “Ultimately, we bought a 14-foot round trampoline from Trampoline Zone. The kids were bouncing within hours of delivery.”
They encountered a challenge while attaching the net—one of the poles was misaligned. But after a quick call to customer service and a 10-minute fix, everything was up and running. “It’s been a hit for birthdays, sleepovers, even Zoom PE classes,” Amy laughs.
7. Where to Find Quality Trampolines and Gear
Not all trampolines are created equal. For peace of mind, it’s essential to choose from a trusted source. Trampoline Zone offers a curated selection of durable, safety-certified trampolines for every yard size and budget.
You’ll also find replacement parts, weather covers, anchor kits, and more. Plus, expert reviews and how-to guides help you make the best choice for your family’s needs.


 Altitude Trampoline Park4.0 (661 reviews)
 Whetstone Climbing4.0 (588 reviews)
 Weevil Play4.0 (98 reviews)
 Urban Air Trampoline and Adventure Park4.0 (1770 reviews)
 Monkey Joe's4.0 (727 reviews)
 Sky Zone Trampoline Park4.0 (3074 reviews)
 Are Trampoline Parks Safe for Kids? Essential Guide for U.S. Parents
 How Often Should You Replace Trampoline Springs? Tips for Proper Maintenance
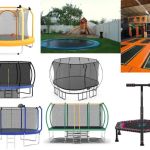 How Much Is a Trampoline? A Detailed Guide to Trampoline Costs and Buying Tips
 Bounce Techniques for Stronger Legs: Effective Exercises and Tips
 Essential Music Gear for Trampoline Dance: Complete Guide
 Fun STEM Experiments Using Trampolines to Spark Curiosity and Learning